
This product is a Blender Add-On, so the first step is to install it.
Download files:
The add-on file is "Procedural_Alleys_v2.0.0", so go to Blender and go to Edit > Preferences > Add-ons > Install…
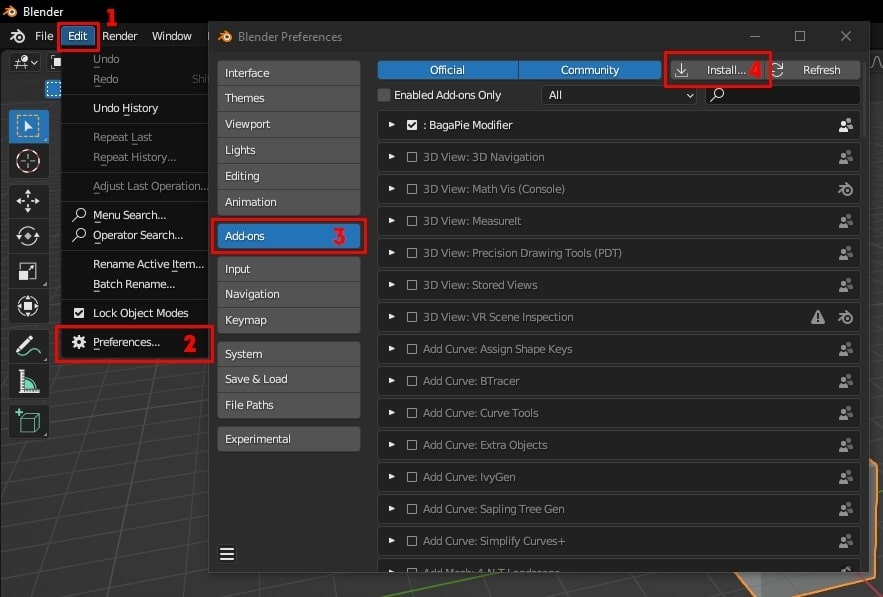
After this, enable the add-on.
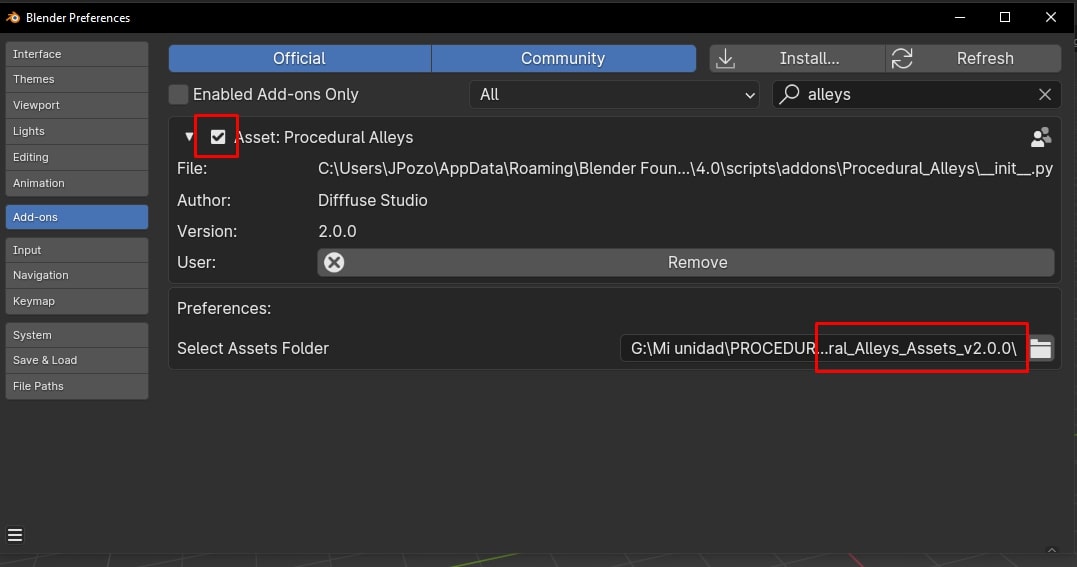
At the bottom, you will see two preferences to configure. "External Image Editor" should be left empty. Unzip the file "Procedural_Alleys_Assets_v2.0.0". This is a folder with the necessary assets for the add-on to work. In the "Select Assets Folder" option, select that folder.
After installing it, you'll be able to see the add-on by accessing the N-Panel. Procedural Alleys has two different tabs:
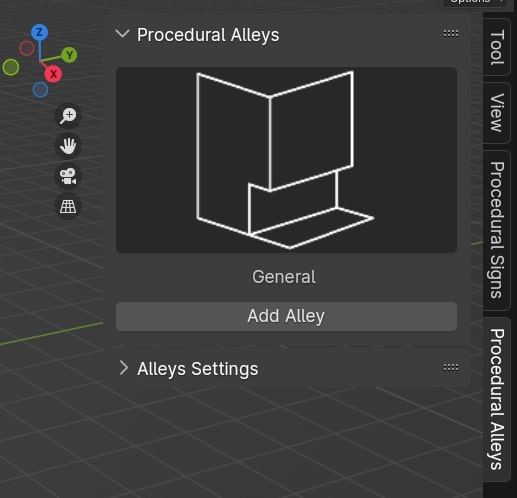
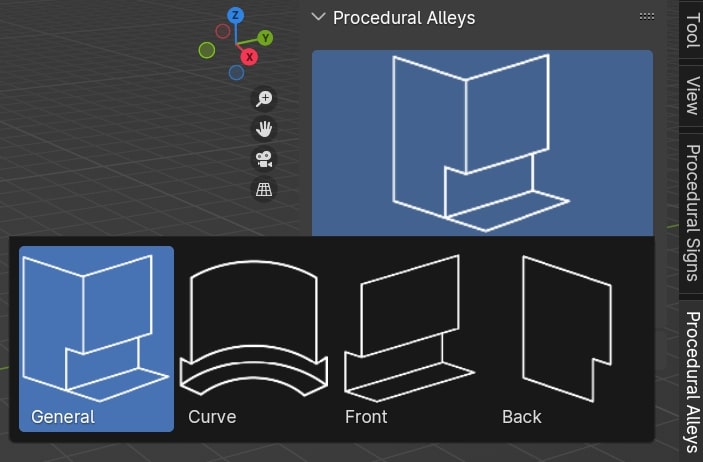
In this tab you will find the different types of alleys offered by the add-on
Once we select the type of alley, press the "Add Alley" button.
The parameters in this tab will only be visible when a alley object is selected, and these parameters will be different depending on the type of alley.
In this tab you can adjust the parameters to get the alley you like best, from the height or width of the building to the amount of details of the facade.
