
This product is a Blender Add-On, so the first step is to install it.
Download files:
The add-on file is “Procedural Crowds - v2.0.0”, so go to Blender and go to Edit > Preferences > Add-ons > Install…
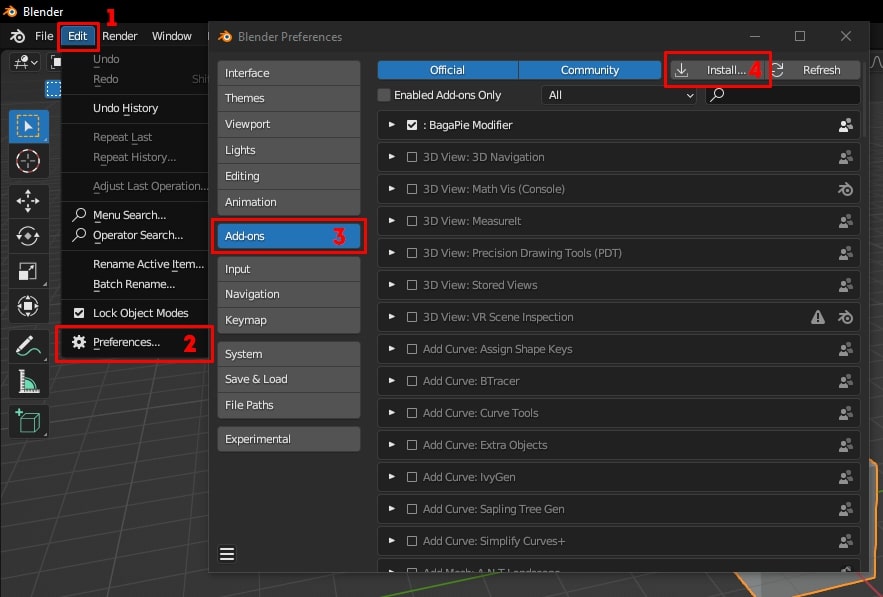
After this, enable the add-on.
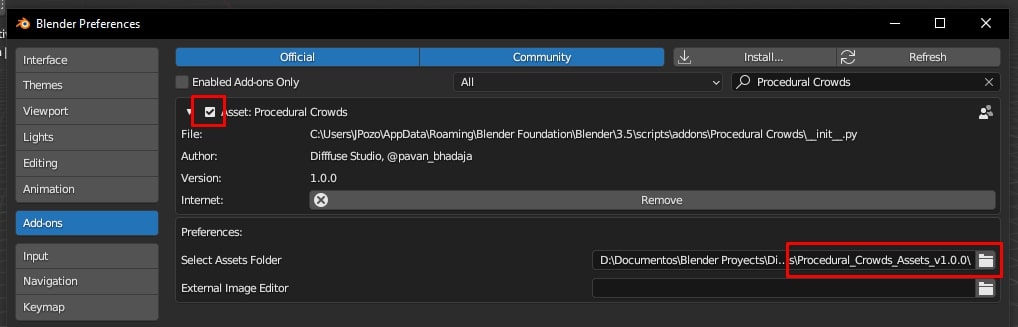
At the bottom, you will see two preferences to configure. "External Image Editor" should be left empty. Unzip the file "Procedural_Crowds_Assets_v2.0.0". This is a folder with the necessary assets for the add-on to work. In the "Select Assets Folder" option, select that folder."
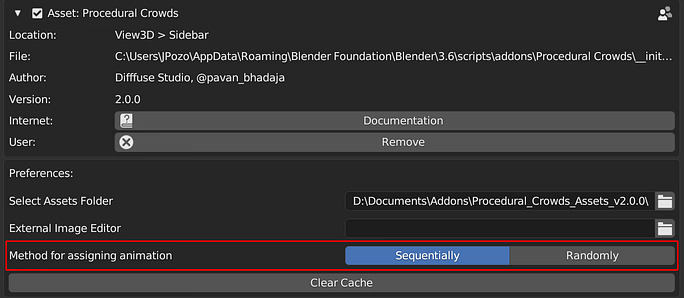
Because with the new import mode the animations are assigned to the models when the crowd is created, we have created this new section in the preferences.
We recommend assigning the sequential mode, since this way you can be sure that each animation is repeated the same amount of times as the others.
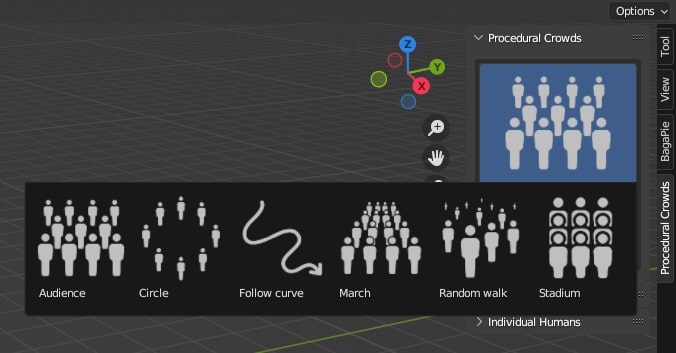
After installing it, you'll be able to see the add-on by accessing the N-Panel. Procedural Crowds has three different tabs:
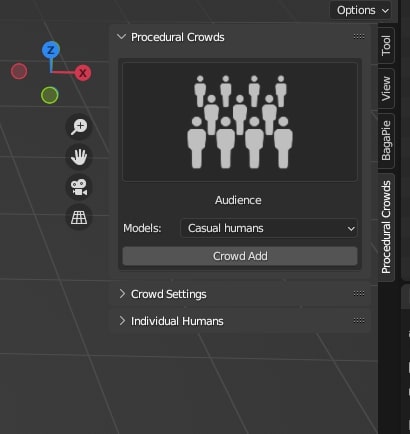
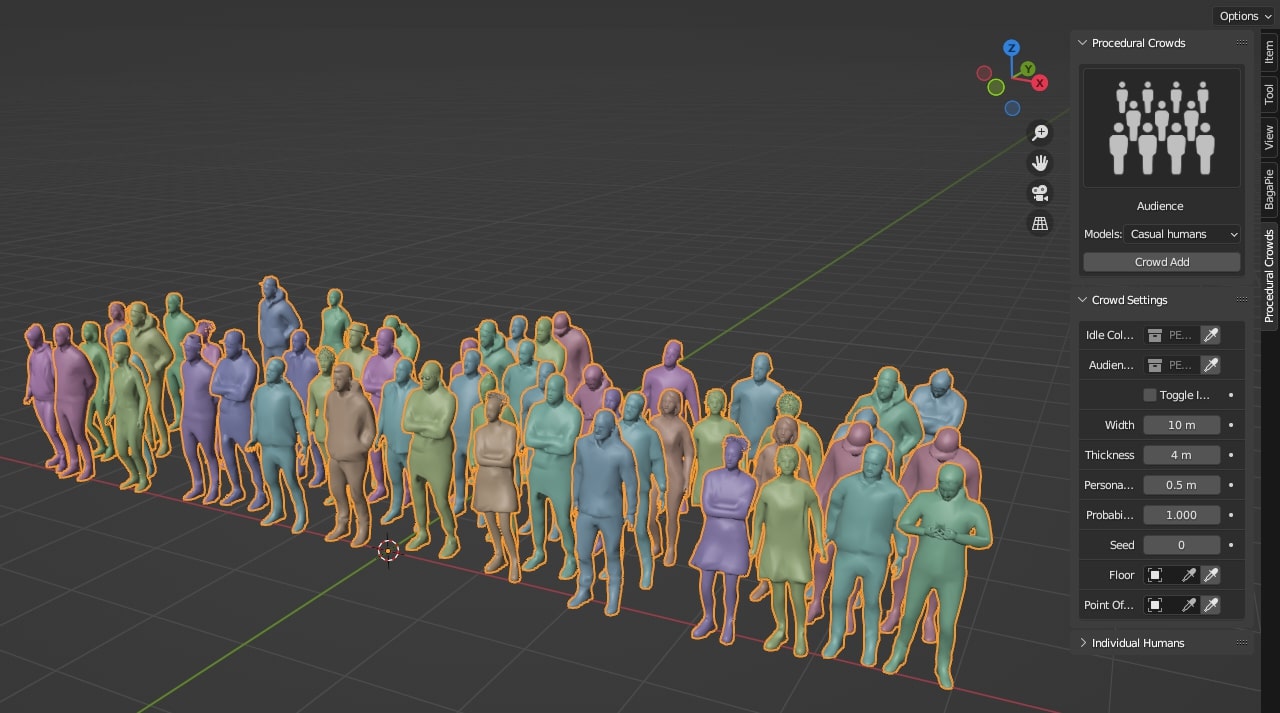
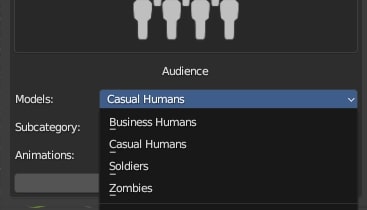
In this tab you will find the different types of crowds offered by the add-on
Also you have an option to select the type of human to use for the crowd. Currently, Procedural Crowds only has one type of crowd, "Casual Humans," which are the ones seen in the promotional spot and images. Once we select the type of crowd and the desired models, we press the "Crowd Add" button."
The parameters in this tab will only be visible when a crowd object is selected, and these parameters will be different depending on the type of crowd.
This last tab is used to import individual humans instead of crowds, as well as to choose the desired animation.
Please note that some models have been directly photo-scanned in a specific pose (crossed arms, hands in pockets, etc.) instead of pose A to obtain a better result. This means that these models will not have arm animations applied to them. However, you can apply any animation and the rest of the body will move according to the animation.
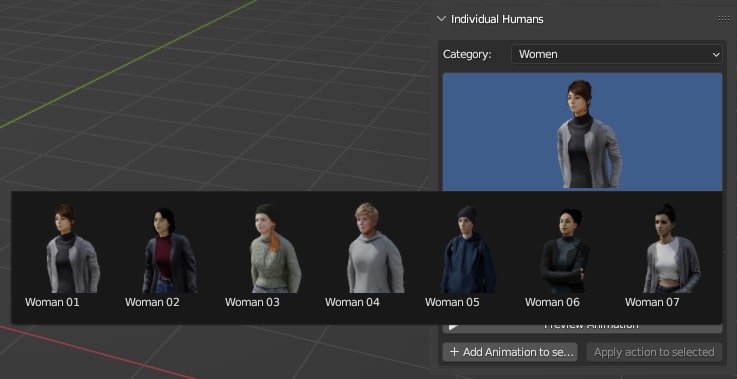
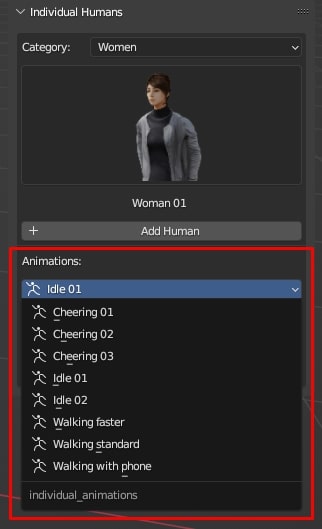
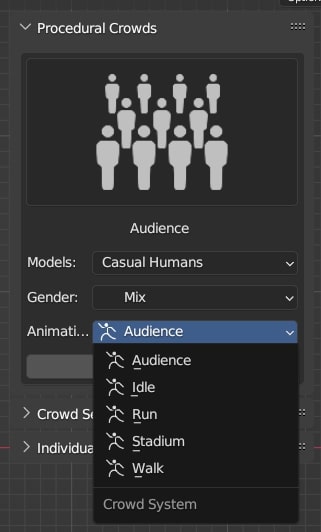
At the top, you can find a dropdown menu to select the category. Depending on the chosen category, just below there's another dropdown menu with images of the models available in that category. Once we have selected the desired model, we press the "Add Human" button.
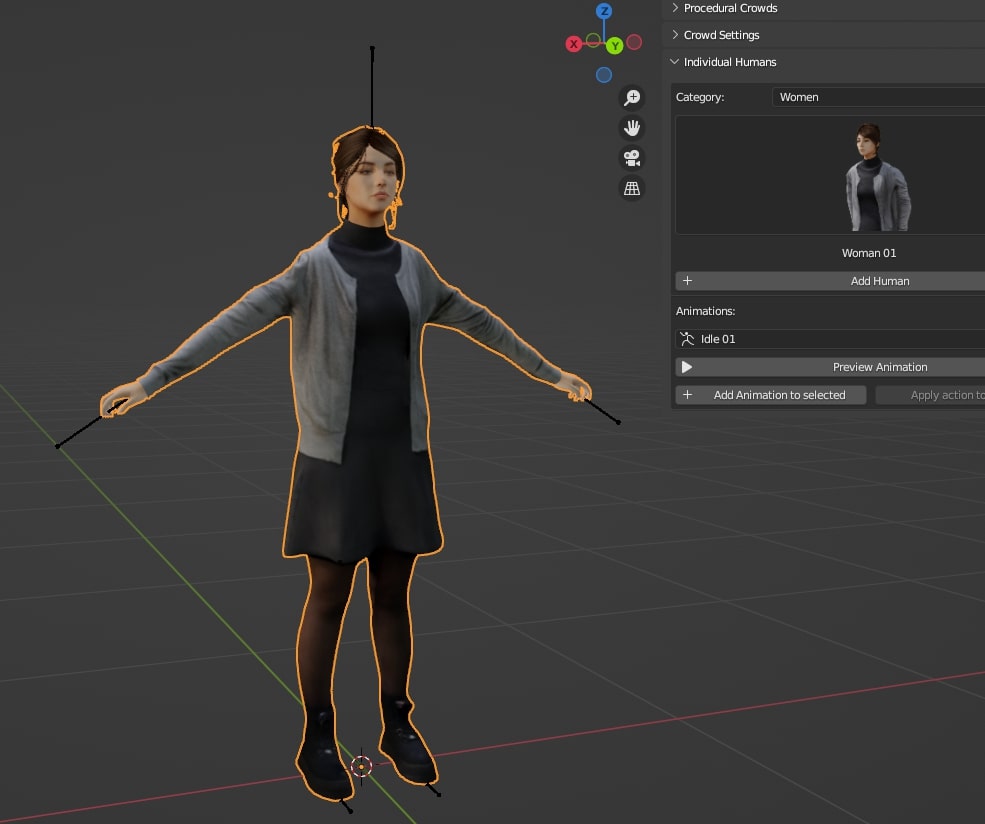
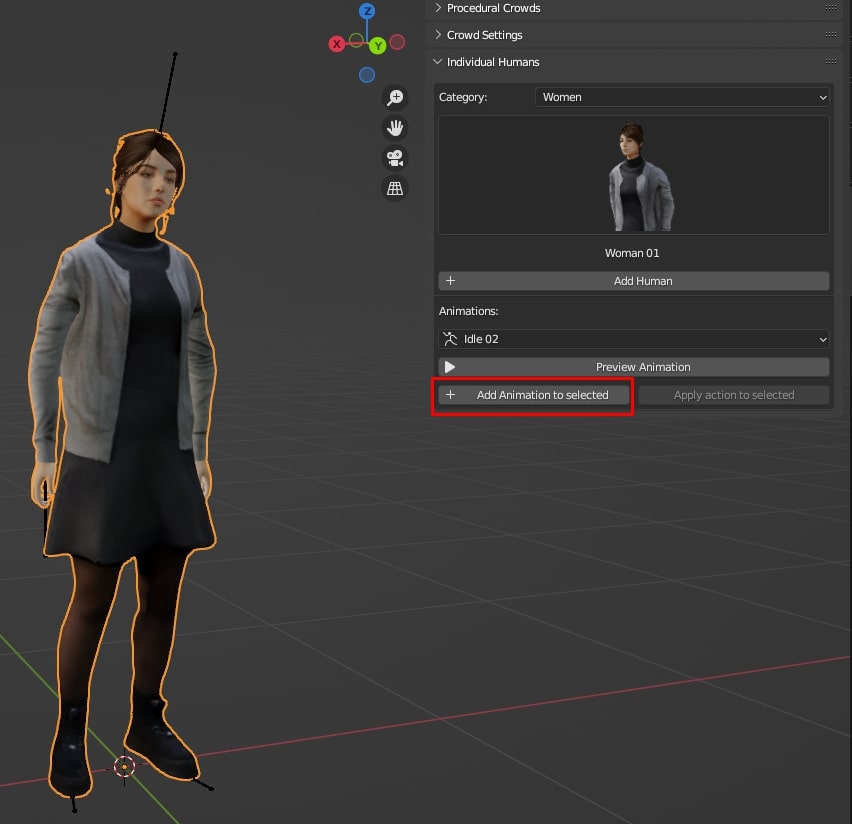
Now we have the model in our scene with its armature in pose A. To assign an animation, we expand the animations menu and choose the one we want. If we want to preview the animation before importing it, we can press the 'Preview Animation' button, which will open the default media player of our operating system with a short video of the animation.
Now we need to select the model (it's important to select the model, not the armature) and click on the "Add Animation to selected" button so that the selected animation is applied.
Also, if we select the armature, the "Action" option will appear at the bottom, where we can switch between the animations available within our project.
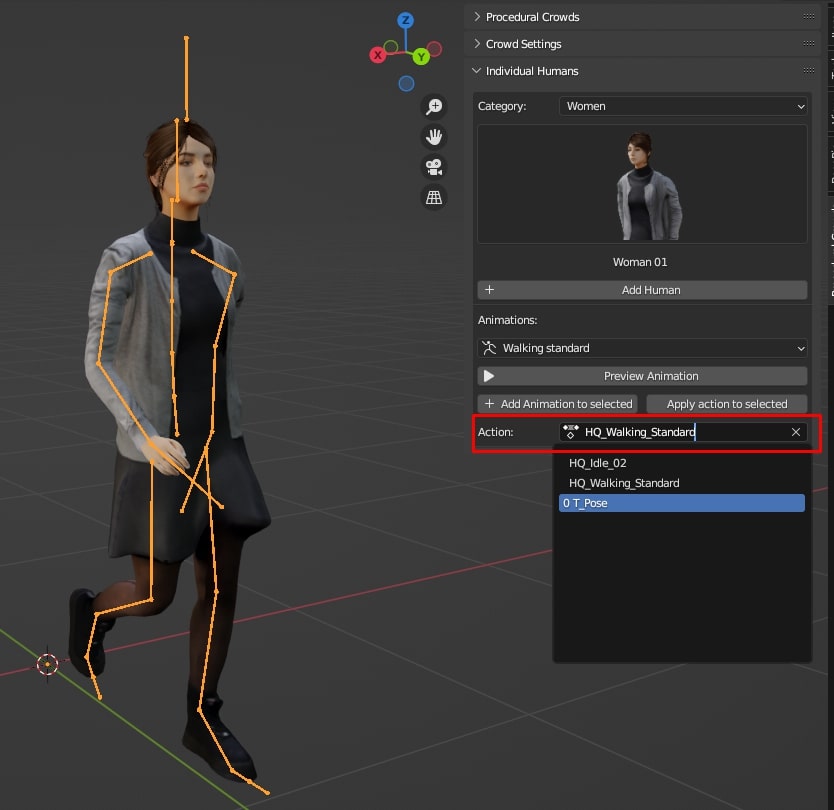
The last button "Apply action to selected" allows us to copy the animation from one model to the rest that we have selected. To do this, we select all the armatures that we want to apply the animation to (dark orange outline) and finally the armature with the animation that we want to copy (light orange outline). Once we have done this, we click the button and it will apply the animation to all the armatures.
To create your own animated models and add them to Procedural Crowds you must create a Blender project containing all the models. These models must be in A pose or T pose, the animations are applied when importing the crowd. Make sure that the animations that we will later store in a different project work correctly with all the models.
On the other hand, we have to create as many Blender files as types of animations we need. In this case we have to store all the animations we need in the Blender file, it is not necessary to associate each one to an armature, they simply have to be stored in the .blend file.

We will save the file, in this case Audience.blend, the file name will be used in the drop-down menu that shows all the animations
Finally, we have to organize the .blend files of both models and animations in folders inside the assets folder.
In the product download files you can find the file CUSTOM_MODELS_FILES.zip, unzip it and you will find the folder YOUR_PACK_NAME, which contains the subfolders and Blender files needed to create your custom packs.
The organization is as follows:
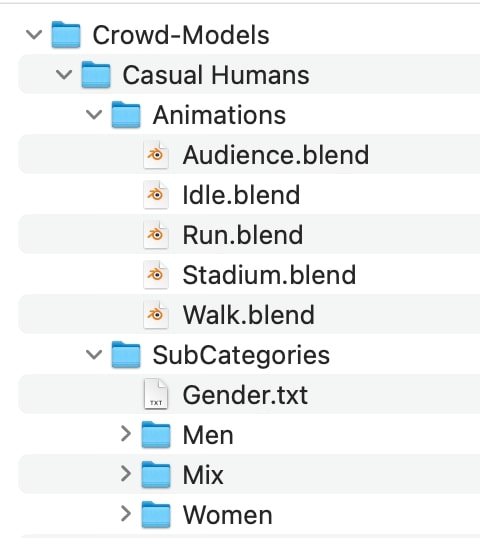
Inside the Crowd-Models folder we will create a new folder with the name we want, for example "Zombies", this name is the one that will be displayed in the drop-down menu.
We create two subfolders named "Animations" and "SubCategories". In the first one we will copy the files containing the animations. In "SubCategories" we will create a folder for each subcategory, this folder will contain our file with the models, the name has to be "models.blend".
Additionally, we can create a .txt file whose name will be displayed to better define the subcategory, in our case we have created one called "Gender.txt" in the case of Casual Humans, since they are divided into "Women", "Men" and "Mix".

That's it, by following these steps you will be able to use your customized models whenever you want in Procedural Crowds. If you need it we also have a video tutorial where we explain these same steps.
