
This product is a Blender Add-On, so the first step is to install it.
Download files:
The add-on file is "Procedural Crowds Pro v1.0.0.zip", so go to Blender and go to Edit > Preferences > Add-ons > Install…
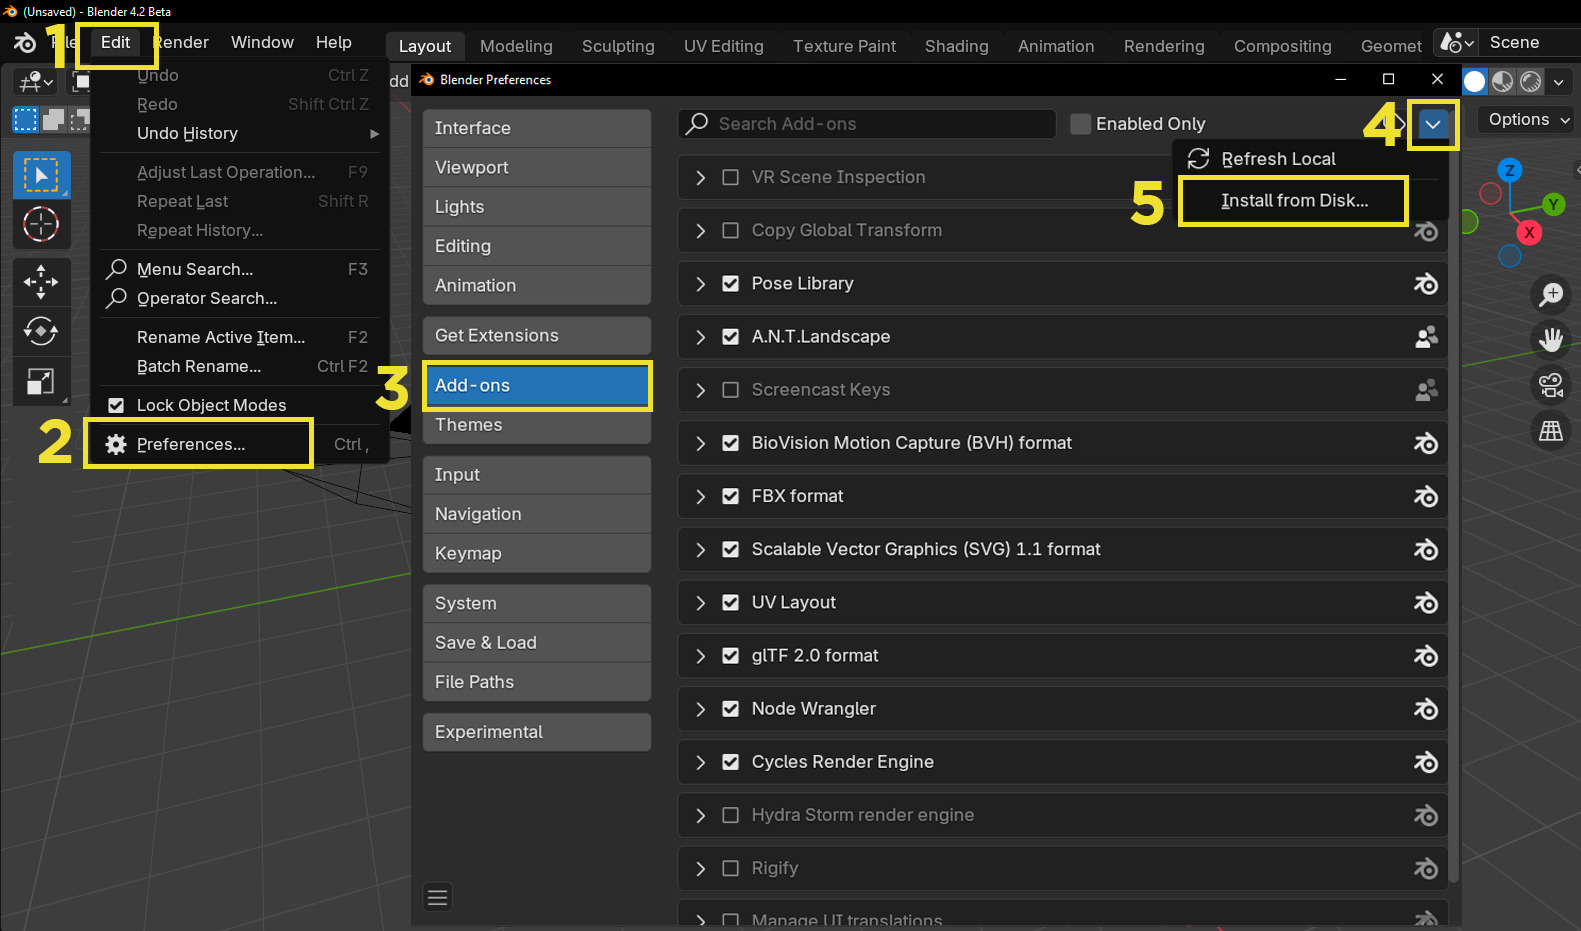
After this, enable the add-on.
At the bottom, you will see two preferences to configure. "External Image Editor" should be left empty. Unzip the file "Procedural_CrowdsPro_Assets_v1.0.0.zip". This folder contains the necessary assets for the add-on to work. In the "Select Assets Folder" option, select that folder."

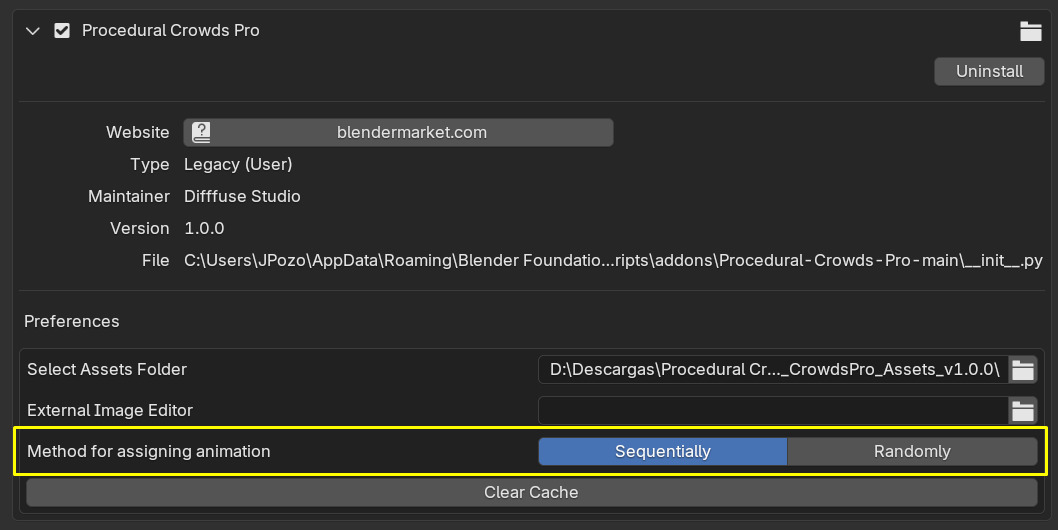
Method for assigning animation:
We recommend using the sequential mode, ensuring that each animation is repeated the same number of times as the others.
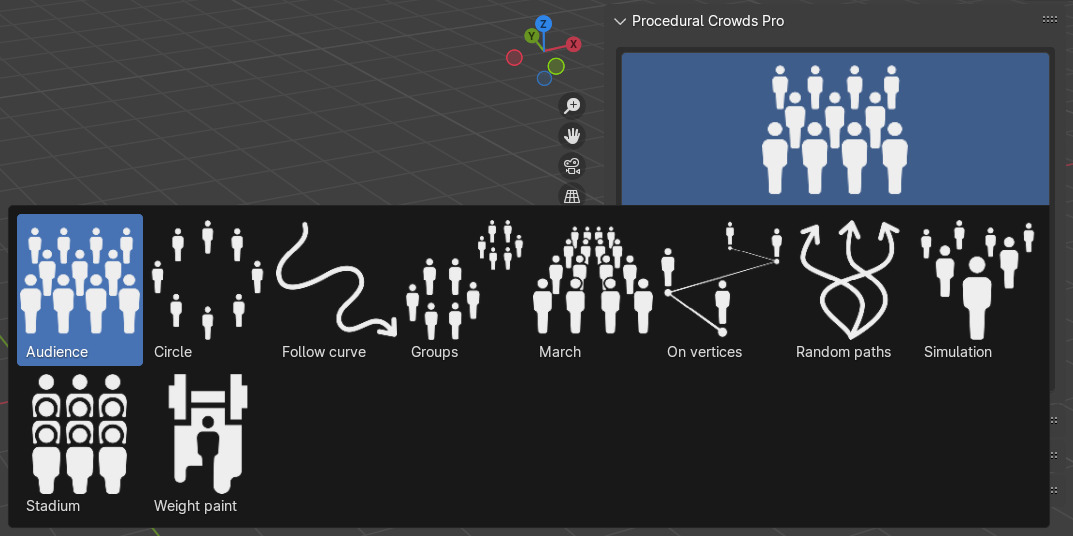
After installing it, you'll be able to see the add-on by accessing the N-Panel. Procedural Crowds Pro has four different tabs:
In this tab you will find the different types of crowds offered by the add-on
After choosing the type of crowd, you have to select the pack of models that you are going to use, the subcategory, and the animation that the models will have.
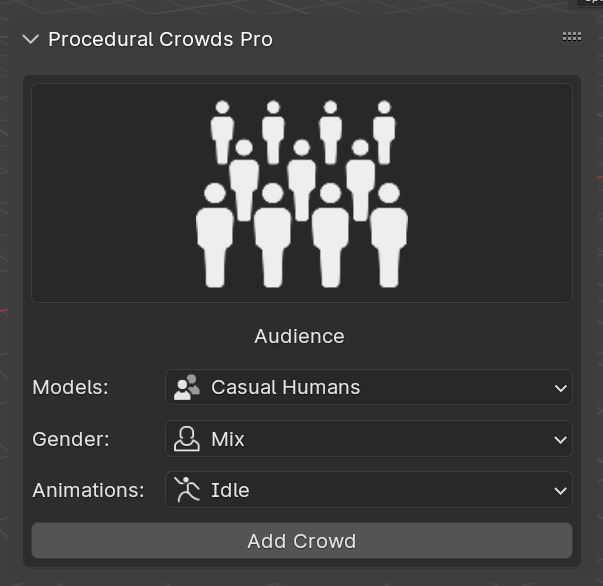
Procedural Crowds Pro offers the Casual Humans pack which contains more than 40 models, and the subcategories by gender "Women", "Men" and "Mix". It also has several animation packs for each situation. Once we select the type of crowd and the desired models, subcategory and animation, we press the "Add Crowd" button.
These settings will only appear when you have a crowd selected.
The parameters are divided into subcategories that you can expand. Both the subcategories and their contents will change depending on the crowd type. You can view a brief description of each subcategory by clicking the help icon on the right.
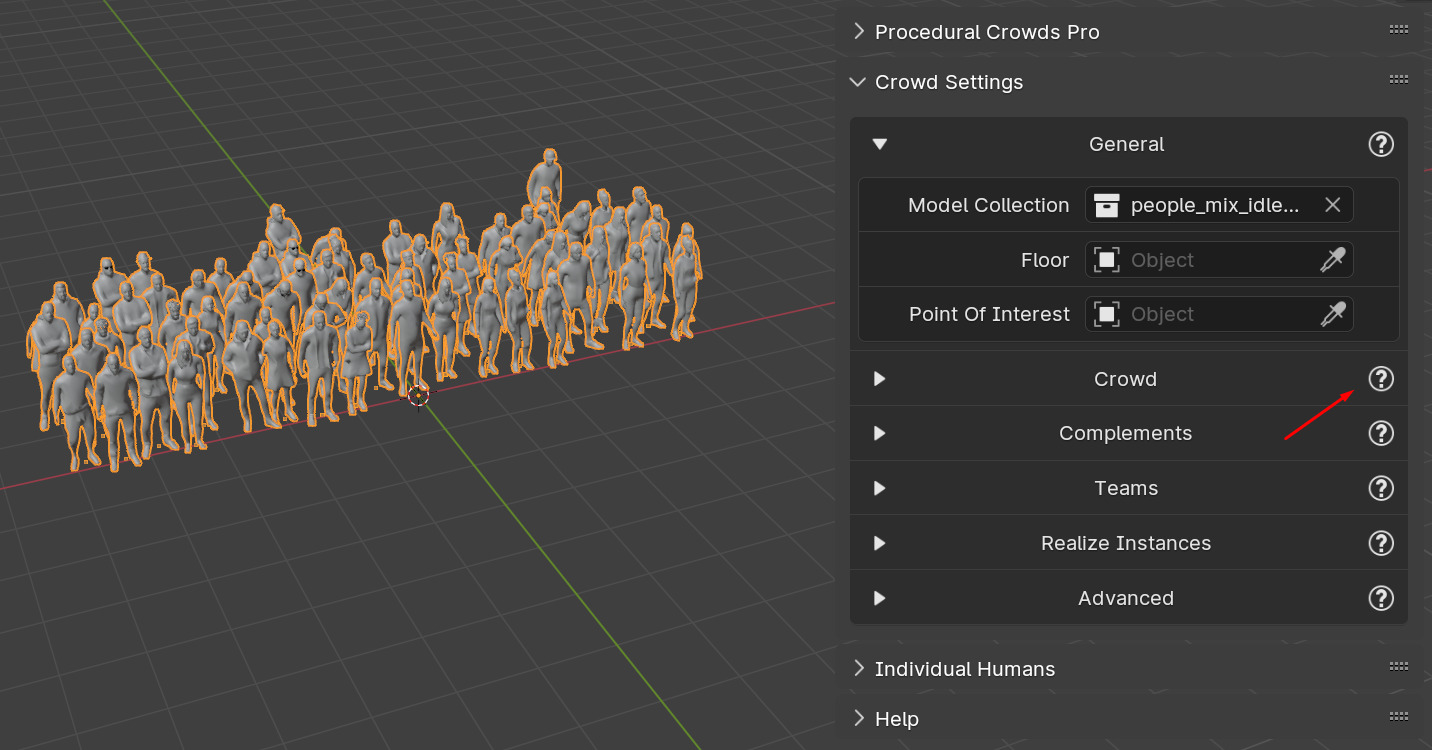
Let's take a look at the most important parameters.
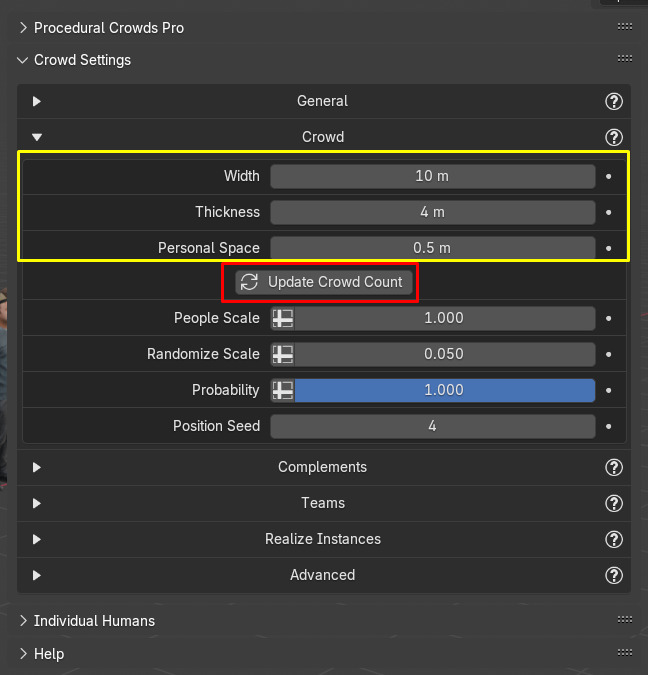
You will find this button in all crowd types (except in "On Vertices" as it is not necessary). It is usually located in the "Crowds" section under the parameters that determine the number of people (Yellow box). Use it every time you change those parameters.
These parameters are only shown when you enter edit mode, as we use the vertices that instantiate each model. When you are in edit mode, remember to change the selection mode to Vertices to be able to see them.
Use this tab when you want to add individual models to your scene, you can select the pack you want and the subcategory from the drop-down menus. You can also see the HIGH/LOW buttons that will determine if the imported model contains a higher or lower number of polygons, choose the one you want according to your needs.

Clicking on the image you will see a thumbnail of each model, once chosen, click "Add Human" to import the model into the scene.
Finally, with the model selected, choose one of the available animations and click on "Add Animation to selected".
If you have several models and you want to copy the animation of one of them, select all the models, selecting the last one containing the animation you want to copy. Then click on "Apply action to selected" and all models will have that animation.
In this tab you can find links to our Youtube tutorial, to this documentation, to our Discord channel and to our BlenderMarket page so you can contact us if you have any questions.
Procedural Crowds Pro allows you to create and use your own custom model packs. You can add your own models, subcategories, and animations using the Manage Custom Packs feature built into the add-on.
For a complete step-by-step guide on how to create and manage your custom packs, visit the dedicated documentation page:
