
Before starting, make sure that your models work correctly with their armatures. Additionally, ensure that all animations work properly with every single armature used by your models.
If the animations do not work with the armatures, they will not work in the add-on either.

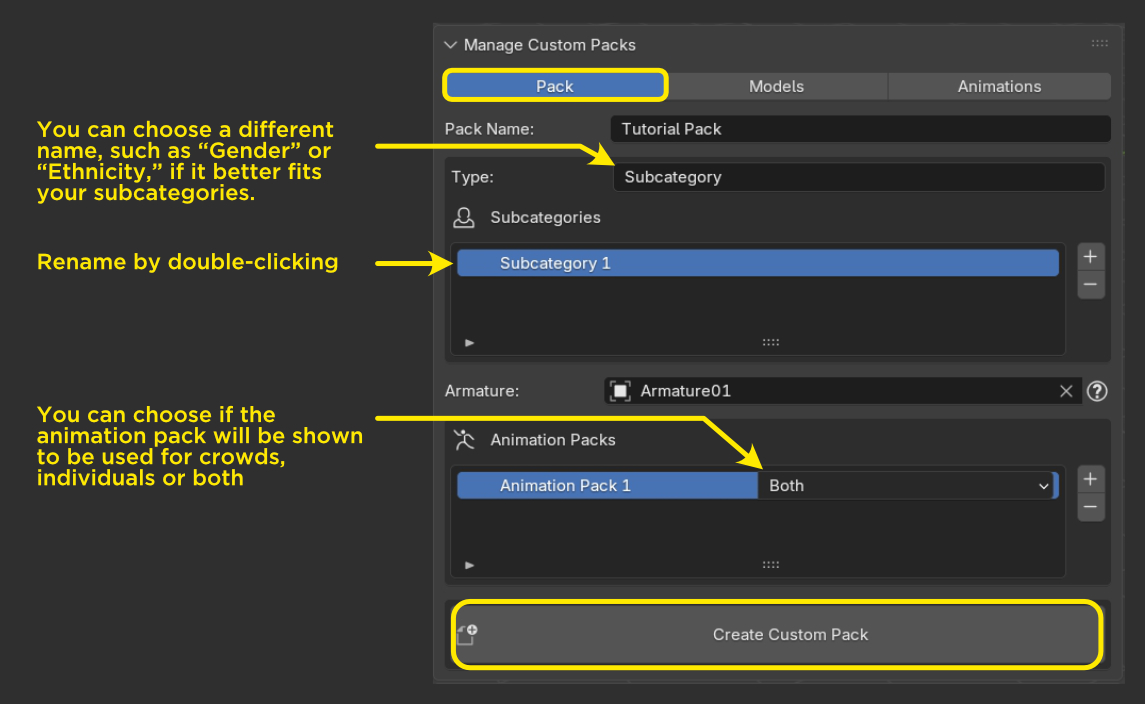
Within this section, you can create and name as many categories as you want. Subcategories are groups of models, for example, in the Casual Humans pack, there are subcategories such as Men, Mix and Women.
You will also be able to add more subcategories later from the Models section.
Before creating animation packs select the armature of any of your models. It does not matter which one you choose, as all armatures must be compatible with the animations you plan to add.
Create and name your animation packs. You can add or remove animation packs later from the Animations section, also you can choose what animation packs can be used in crowds, individuals or both.
Finally, click the Create Custom Pack button.
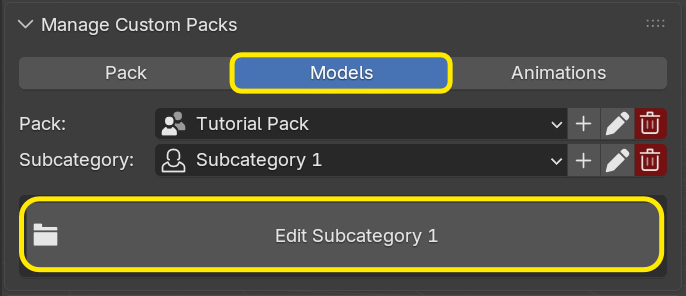
Go to the Models section and select your pack and a subcategory. Then click Edit.
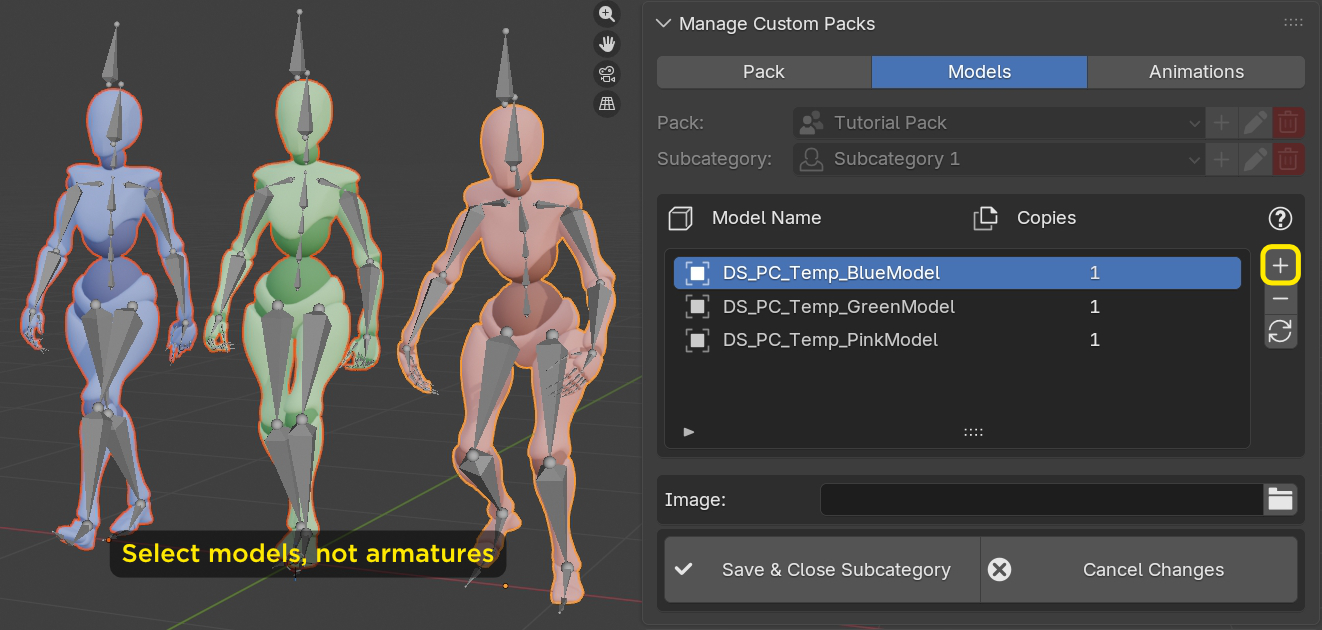
To add models, select them in the viewport and click the + button.
In order to be added, models must pass the following checks:
If any requirement is not met, a popup window will indicate the issue.
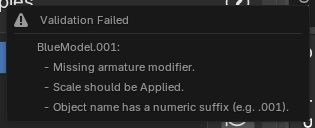
Fix the problem and press + again to add the model.
The Copies function allows you to store more than one instance of the same model in your pack. This is useful if you want a specific model to appear more frequently in the crowd.
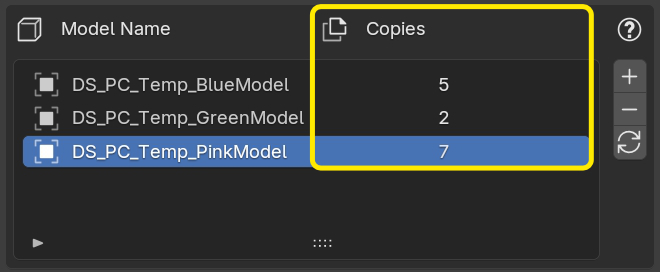
Additionally, due to the way the add-on works internally, if your pack contains fewer models than the number of animations in your animation packs, not all animations will be used.
Therefore, each subcategory should contain at least as many models as there are animations in your animation packs.
If you do not have enough models, use the Copies function to duplicate them as many times as necessary.
Below the model list, you can assign a thumbnail image to your models, these thumbnails are used in the Individuals feature. Assigning a thumbnail is optional.
To assign a thumbnail click the image icon to select it, then click Assign Thumbnail to assign the selected image to the model currently selected in the list.
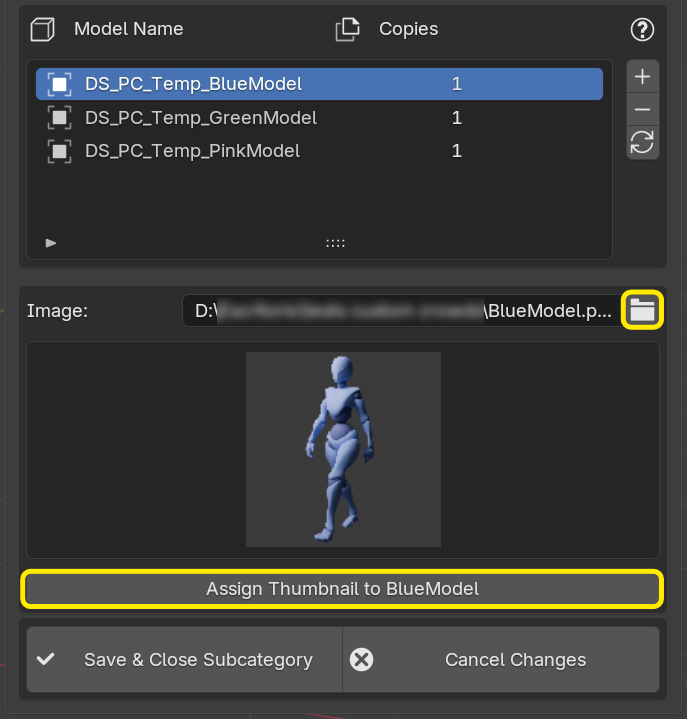
When you are finished, click Save & Close to save your changes or Cancel Changes to discard them.
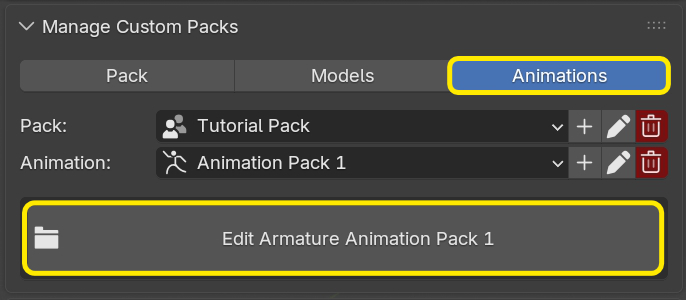
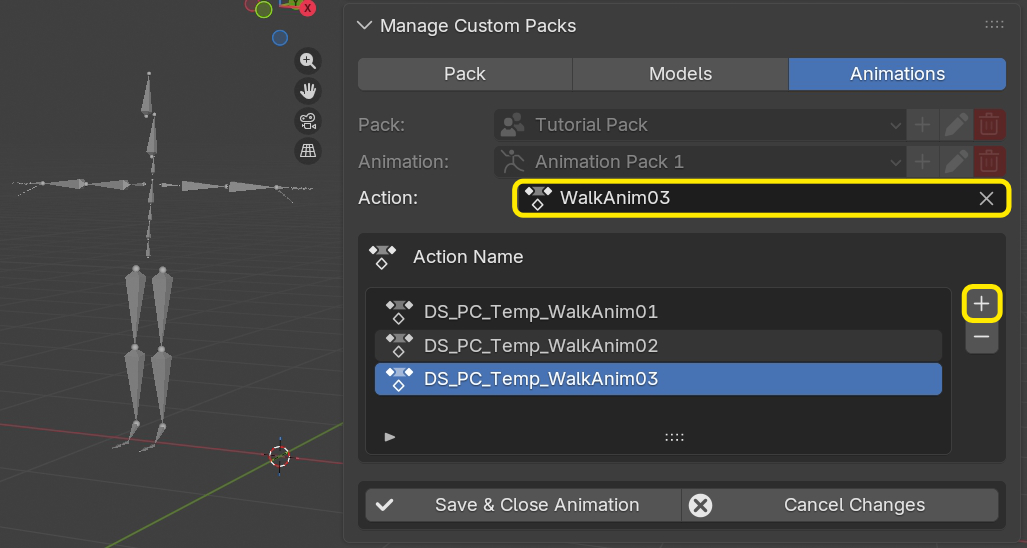
To add animations go to the Animations section, select an animation pack and click Edit.
In this case you need to select each Action individually from the dropdown menu.
Add it to the list using the + button.
For better variation, it is recommended to duplicate your animations beforehand and apply an offset to them. This prevents all models from moving in unison.
Once finished, save your changes.
You are now ready to create crowds using your custom models.
At any time, you can:
To delete a pack, you must type its name as confirmation as this action cannot be undone.

The following video tutorial covers the complete process of creating and managing custom packs in Procedural Crowds Pro.
